
Views: 0 Author: Site Editor Publish Time: 2026-09-15 Origin: Site


You want to apply graphite sheets correctly for optimal thermal performance. The process needs careful surface preparation, proper handling, precise cutting, and careful application. Graphite sheets are a flexible, reusable thermal interface material that works better than many others when used correctly. For instance, a graphite sheet conducts heat in- at hundreds to over 1000 W/mK, while thermal pastes manage 1–12 W/mK. This flexible graphite material conforms to uneven surfaces, reducing contact resistance. Understanding the graphite sheet vs thermal paste comparison helps you choose wisely. By mastering each step—from material properties to troubleshooting—you achieve reliable heat dissipation.
Clean both surfaces with isopropyl alcohol before you put on the graphite sheet.
Hold the sheet only by its edges so your fingers don't leave oils or cause static damage.
Cut the sheet with a sharp blade or die-cutting to avoid tearing it.
Press evenly from the center to the edges to remove trapped air bubbles.
After you put it in, look for wrinkles, lifted edges, and make sure it covers the whole area.
To reuse the sheet without damage, slowly remove it from one corner.
Place the sheet so heat moves through its thickness, from one part to another.
A graphite sheet is a thin, layered material made from compressed carbon atoms arranged in a hexagonal lattice. DASEN, a leading manufacturer with 170 employees and a 10,000-square-meter workshop, produces both synthetic and natural graphite sheets under ISO9001 certification. These sheets function as a thermal interface material that sits between a heat source and a heat sink to improve heat transfer.
The material's structure creates a unique property called anisotropic conductivity. Heat flows rapidly along the sheet's but moves slowly through its thickness. Synthetic graphite sheets achieve a thermal conductivity of 1500–2000 W/(m·K) in-, yet only 5–10 W/(m·K) through-. This directional behavior means you must orient the sheet correctly during installation. The graphite sheet vs silicone pad comparison shows why this matters: silicone pads offer isotropic conductivity, spreading heat evenly in all directions, while graphite excels at spreading heat horizontally across a surface.
Property | Graphite Sheet | Silicone Thermal Pad |
|---|---|---|
Material Composition | Layered carbon atoms (hexagonal lattice) | Silicone rubber filled with metal/ceramic powders |
Thermal Conductivity | 600–1700 W/(m·K) in- | 0.8–8.0 W/m·K |
Thickness | 25–100 micrometers | Typically thicker |
Flexibility | High – conforms to complex shapes | Lower – less adaptable to irregular surfaces |
Cost | More expensive due to manufacturing process | Generally more cost-effective |
Best For | High-performance devices needing rapid heat dissipation | Cost-sensitive applications requiring stability and gap filling |
Flexible graphite sheets conform to uneven surfaces better than rigid alternatives. When you press a sheet against a CPU or power module, it deforms slightly to fill microscopic gaps between the two contacting surfaces. This conformity reduces contact thermal resistance, allowing heat to cross the interface more efficiently. The graphite sheet vs thermal paste comparison reveals another advantage: paste can pump out or dry over time, while a solid sheet maintains consistent contact.
The compressibility of flexible graphite also accommodates mechanical tolerances in your assembly. If your heat sink sits slightly crooked or your component height varies, the sheet compresses to bridge that difference. DASEN's production capacity of 6 million square meters per year ensures consistent sheet quality, so you can rely on uniform thickness and density across every piece you install. This strong thermal conductivity combined with mechanical flexibility makes graphite sheets ideal for electronics where vibration or thermal expansion causes components to shift.
Unlike thermal paste that requires cleaning and reapplication, graphite sheets offer genuine reusability. You can remove an undamaged sheet from one component and reposition it on another without losing performance. This characteristic makes the graphite sheet vs other thermal interface materials comparison favorable for prototyping and testing scenarios where you frequently disassemble assemblies.
The peel-and-stick design simplifies installation. Each sheet comes with a protective liner that you remove slowly to avoid static cling. You then place the sheet onto your cleaned surface and apply even pressure with a roller or your finger to eliminate trapped air. DASEN also offers silicone thermal pads as a complementary product for applications where you prefer non-conductive properties. However, for high-heat applications requiring rapid dissipation across a large area, flexible graphite sheets deliver superior results. Their lightweight nature—25% lighter than aluminum and 75% lighter than copper—reduces overall system weight while maintaining excellent heat spreading capability.
Before you put on this thermal interface material, you need to get both the surfaces and yourself ready. This step decides how well the material will work. If you skip or rush the prep, you will get poor heat transfer and wasted effort. Follow these steps to set up the best conditions for your installation. Good prep helps the sheet stick correctly and move heat well. Taking time now means you will not have to redo the work later.
You must clean the surface for good thermal contact. This step is required. Any dirt, dust, or bits on the surface will hurt adhesion and lower the thermal performance you need from the material. These bits create tiny gaps that trap air. Air blocks heat. It stops heat from moving from your component to the heat sink.
Use isopropyl alcohol and a lint-free wipe to clean. Put a small amount of alcohol on the wipe. Wipe the surface in one direction. Do not wipe in circles. This way lifts dirt away instead of pushing it around. Let the surface dry fully before you move on. A clean, dry cloth works too if you do not have alcohol. Your goal is a surface with no dust or leftover marks. Even a small fingerprint can cut heat transfer by a lot. You want the two surfaces to touch as closely as possible.
Flexible graphite materials need careful handling. The sheets react to static electricity and finger oils. Static can harm the sensitive electronic parts you are trying to cool. Finger oils leave a film that blocks thermal contact. Always hold the sheet by its edges. Wear gloves if you must touch the middle area.
Work on a flat, clean surface when you get the sheet ready. Do not put the sheet on rough or dirty areas. These can scratch or dirty the material. The flexible graphite structure is strong but still can get damaged. A scratch or fold creates a weak spot where heat transfer drops. Keep the protective liner on until you are ready to place the sheet. This liner keeps dust and oils off the material while you prepare.
Measure the area where you will put the graphite sheet. Use a ruler or caliper to get exact sizes. The sheet should cover the whole heat source surface. Do not leave gaps between the part and the sheet. Gaps let air stay in the connection. Cut the sheet a bit larger than the area if you need to. You can trim the extra later.
Do a dry-fit before you take off the liner. Put the uncut sheet over the target area. Check that the shape lines up right. Mark any cutouts needed for parts or mounting holes. This step stops mistakes that waste material. You can move the sheet around without worrying about sticky adhesive. Once you see the fit is good, you can move on to cutting and final placement. The extra minute you spend dry-fitting saves time and material later.
You need the right tools to cut a graphite sheet accurately. This material needs special care because it is brittle and layered. Diamond wire saw cutting is the best method for this job. It gives you clean, precise edges without harming the sheet. The diamond-coated wire makes a narrow cut. This means you waste less material. The process also uses water cooling. Cooling controls dust and stops the edges from crumbling. This matters a lot for such a brittle material. You get a smoother finish. You also need fewer extra steps after cutting.
Other cutting methods do not work well. The source says that when converting graphite sheets, conventional die-cutting is the only method that works. Laser cutting and knife cutting do not work well for this material. You should avoid using a standard knife or scissors if you want clean edges. Those tools can cause tearing or shedding. The flexible graphite structure can break apart if you use the wrong tool. DASEN makes 6 million square meters of sheets each year, so quality stays steady. But you must still cut carefully to keep that performance. The right tool makes a big difference in the final result.
You must measure the area before you cut. Use a ruler or caliper to get the exact size. Mark the cutting line clearly on the protective liner. Do not cut freehand. The supplier offers die-cutting and molding services for graphite sheets. They can make custom sizes and shapes that match your exact needs. This is the best way to get accurate dimensions. Extra steps like adhesive backing and surface coating support the final size. You can also ask for these services when you order the sheet.
If you cut the sheet yourself, you need to be careful. A small mistake can ruin the piece. You want the sheet to cover the whole heat source surface. Gaps lower the performance of the thermal interface material. Use a sharp blade and a straight edge for straight cuts. For curved cuts, use a template. Always cut on a flat, clean surface. This stops the material from moving. You can also use a die-cutting machine if you have one. The machine gives you the same accurate cut every time. This matters a lot for high-volume production.
Complex shapes need careful planning. You may need cutouts for parts, mounting holes, or other items. Die-cutting is the best method for these shapes. The die cuts through the flexible graphite cleanly without harming the edges. You get a precise shape that matches your design. The supplier can make custom dies for your specific pattern. This saves you time and effort.
If you cut complex shapes by hand, you need a steady hand and a sharp blade. Use a template to guide the cut. Work slowly to avoid tearing. Remember that knife cutting does not work well, as the source says. You may get rough edges or uneven shapes. For best results, use conventional die-cutting. This keeps the sheet strong. You also avoid the risk of layers separating. The flexible graphite material works best when you cut it right. A clean cut ensures good thermal contact. You can trust the sheet to work as intended.
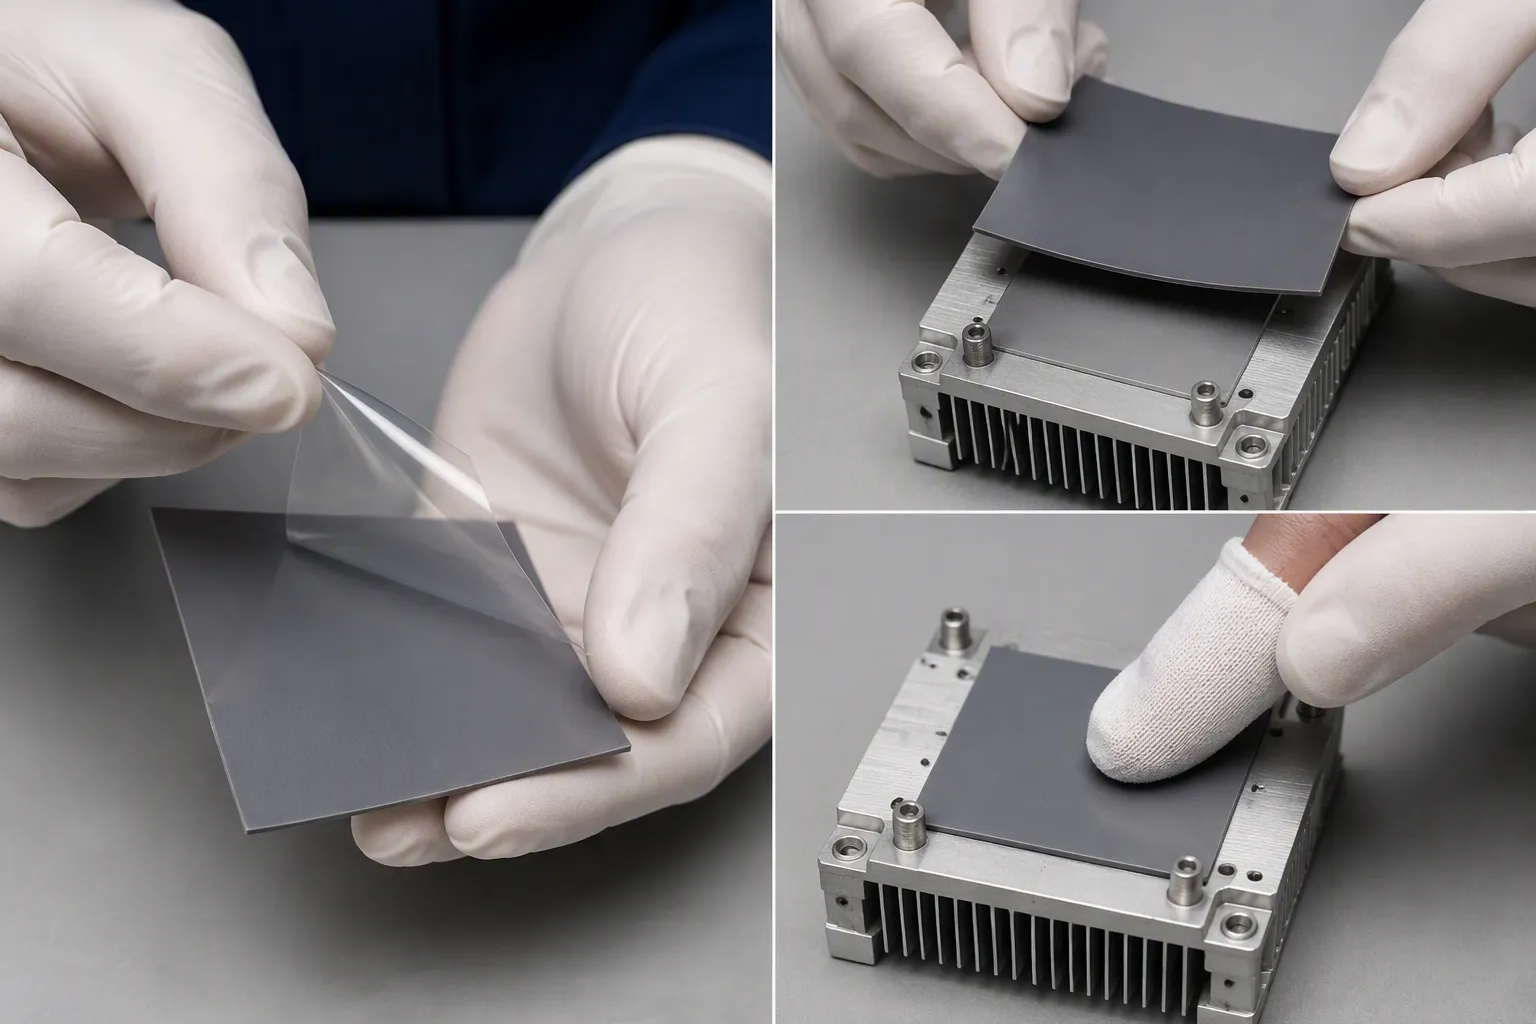
Your graphite sheet comes with a protective liner on one side. This liner keeps dust and oils off the sticky surface. Pull it off slowly and steadily. A fast pull makes static electricity. That static pulls dust from the air. Those dust bits then sit between your sheet and the heat source. They make tiny gaps that stop heat from moving.
Hold the sheet by its edges while you peel. Your fingers have natural oils. Those oils lower thermal contact. If you need to touch the sticky side, put on clean gloves. Work on a flat, clean surface. This surface should have no debris or rough spots.
Before you peel the liner, check the sheet direction. This step matters because of anisotropic conductivity. The material is made of stacked graphene layers. Inside each layer, atoms bond tightly. Heat moves fast along this . In- thermal conductivity can reach up to 1800 W/m-K. Between the layers, weak van der Waals forces hold the structure together. Heat must move across these weak bonds. This makes through- thermal conductivity much lower. You need the sheet's thickness direction lined up with the heat path. The heat must go from your component, through the sheet's thickness, and into the heat sink.
Place the sheet over your cleaned surface before you take off the liner completely. Line up one edge first. Lower the sheet slowly across the surface. This way stops air from getting trapped underneath. Once the sheet touches the surface, it sticks right away. You cannot move it easily. Go slowly during this step.
After placement, you must press evenly across the whole sheet. This pressure pushes out trapped air. It also helps the sheet fit tiny surface bumps. Use a small roller or a soft cloth-covered finger. Start from the middle of the sheet. Move outward toward the edges. This motion pushes air bubbles to the outside where they can leave.
Do not press too hard. Too much force can hurt the flexible graphite structure. The material squishes under pressure, but it has limits. Too much force can crush the layers. This crushing lowers the through- heat path. You want firm, steady pressure, not brute force.
Air bubbles create hot spots. These hot spots lower how well your thermal interface material works. A bubble acts like an insulator. It blocks heat from crossing the interface. Even a small bubble can raise temperatures a lot. Check your work by looking at the sheet from an angle. Light bouncing off the surface shows bubbles as shiny spots. If you see any, press them out gently toward the closest edge.
The anisotropic nature of the material means you cannot depend on sideways heat spreading to fix a bad contact point. Heat moves mostly in-. If a bubble sits between the component and the sheet, the heat cannot spread sideways to go around it. The heat stays trapped at that spot. Proper pressure stops this problem completely.
Once applied, your graphite sheet must stay in place. Equipment shaking and heat expansion can move the sheet over time. A moved sheet loses contact with the heat source. Performance drops right away. You need mechanical ways to hold the sheet firmly.
The easiest way uses the heat sink itself. When you mount the heat sink, it presses the sheet against the component. This clamping force holds everything in place. Make sure your mounting screws press evenly. Uneven clamping can squeeze one side of the sheet while the other side stays loose.
For bigger assemblies, think about protective end seats. These seats clamp the weak edges of the sheet. They stop sideways movement during use. The seats also guard the sheet from harm during handling and upkeep.
Vacuum adsorption tables give another option for production settings. These tables hold the sheet flat during assembly. You should check the vacuum power before use. Test with a 5mm thick, 20cm×20cm graphite sheet. Look for any sliding during edge cutting. A machine with multi-zone independent pneumatic valves gives even suction. For example, an 8-zone table spreads vacuum evenly across the surface. An adsorption table with -grade high-strength honeycomb structure gives completely even air distribution. This strong, steady suction stops any movement during work.
Some uses benefit from extra adhesive. You can put a thin layer of thermally conductive adhesive at the edges. This adhesive holds the sheet without blocking the main heat path. But this method gives up reusability. Once you use adhesive, you cannot remove the sheet cleanly.
DASEN offers silicone thermal pads as a matching product. These pads work well where you want non-conductive properties. They also fill gaps on uneven surfaces. But they do not have the high thermal conductivity of flexible graphite. Choose based on what you need.
Remember that flexible graphite sheets stay reusable if not damaged. Careful removal keeps the sheet for later use. Peel slowly from one corner. Do not bend or fold the material during removal. Store flat sheets in a clean, dry place.
Your thermal interface material works best when held firmly. Take time to check that the sheet stays in place. Look at edges for lifting after assembly. Confirm the heat sink presses evenly. These checks take seconds but save hours of fixing problems later. Different thermal interface materials fit different mounting situations. Knowing your options helps you pick the right way for each project.
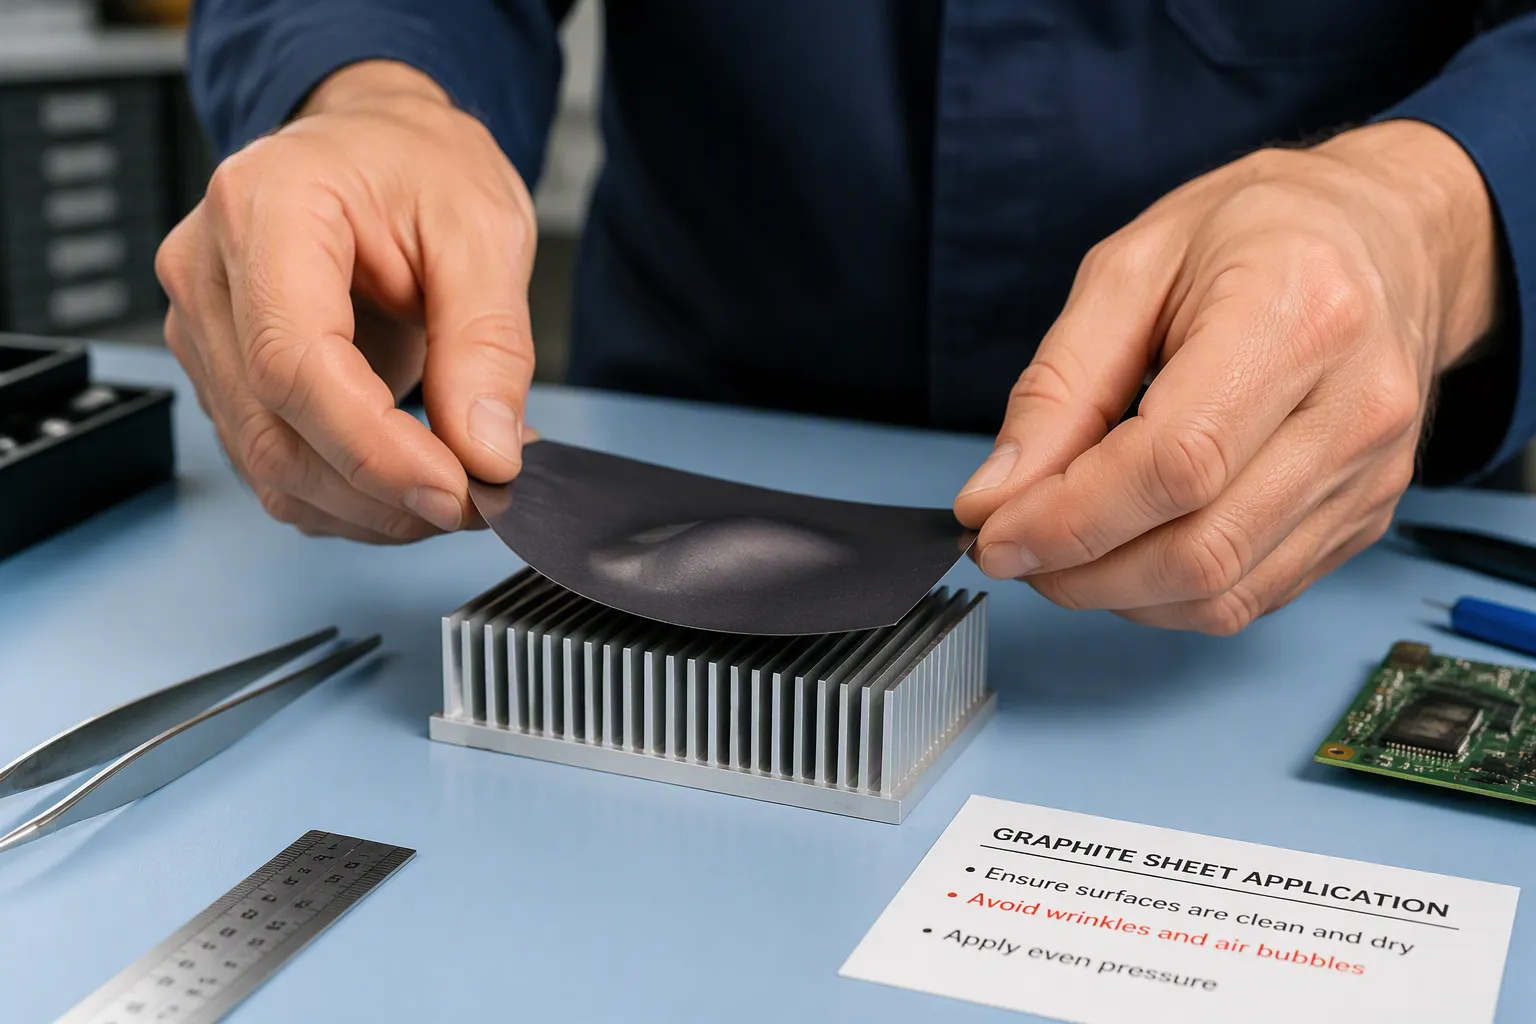
Even skilled technicians make errors when installing graphite sheets. These mistakes lower thermal performance and waste costly material. Knowing what goes wrong helps you avoid these problems. Each mistake has a clear cause and an easy fix. You can master the application process by learning from common failures.
Wrinkles happen when you handle the sheet carelessly or place it on an uneven surface. A wrinkled graphite sheet loses contact with the heat source. The raised areas trap air beneath the material. This trapped air creates a barrier that blocks heat flow. Studies show that wrinkles add air bubbles into the material structure. These bubbles increase phonon scattering, which directly lowers thermal conductivity. The air gap grows larger, breaking the continuous heat path.
You can stop wrinkles by working on a flat, clean surface. Lay the sheet down gently without bending or folding it. When you peel off the protective liner, do so slowly and steadily. A quick pull can make the sheet curl or fold onto itself. Hold the sheet by opposite corners to keep it flat during placement. Lower it onto the target surface in one smooth motion. Do not let one edge touch down before the other. This uneven contact creates creases that are hard to remove later.
Production facilities avoid wrinkles by applying tension to the sheet during processing. You can copy this effect at your workbench. Gently pull the sheet tight between your fingers as you position it. This slight tension keeps the material flat and stops fold lines from forming. If you see a wrinkle after placement, do not try to smooth it out with your fingers. The pressure may harm the layered structure. Remove the sheet carefully and start again with a fresh piece.
Air bubbles act as insulators in a thermal interface material. They block heat from crossing the gap between your component and the heat sink. Even a small bubble can raise operating temperatures a lot. The anisotropic nature of graphite means heat cannot spread sideways to go around a bubble. The heat stays trapped at that spot, creating a hot zone that harms sensitive electronics.
Bubbles form when you press the sheet down unevenly or when dust particles sit on the surface. You can remove them with a simple tool. Take a credit card or similar flat, rigid object. Wrap it in a soft, lint-free cloth to avoid scratching the sheet. Starting from the center of the sheet, push the card outward toward the edges. Apply firm, steady pressure as you move. This motion forces trapped air out through the sides of the sheet.
Work slowly and carefully across the whole surface. Check your progress by looking at the sheet from a low angle. Light reflecting off the surface shows bubbles as shiny spots. Press these spots out gently with the card. Do not use too much force, as this can crush the graphite layers and lower through- conductivity. A clean surface stops most bubbles from forming in the first place. Wipe both the component and the heat sink with isopropyl alcohol before application.
Graphite has a layered crystal structure. When a cutting tool applies sideways force, it exceeds the bonding force between layers. The layers slide apart and tear, causing powder shedding and edge cracking. This damage ruins the sheet and dirties your work area. You cannot patch a torn sheet. The damaged area creates a weak point where heat transfer fails. Throw away the damaged piece and use a fresh one.
Tool sharpness plays a key role in stopping tears. Dull blades tear rather than cut graphite fibers. This tearing leads to chipping along the cut edge. Check your blades often and replace worn inserts right away. Tool shape also matters. For thin sheets around 0.5mm, use a sharp 30-degree blade. This angle lowers cutting resistance and stops tearing. For thicker sheets above 3mm, a rigid 45-degree or 60-degree blade stops surface skewing and breakage.
High-density sheets over 3mm need special equipment. A pneumatic oscillating knife with an 8mm stroke gives the needed amplitude and penetration. This tool stops buckling and edge breakout during cutting. During batch cutting, vacuum suction loss through cut lines causes material vibration and burrs. A high-power, multi-zone vacuum system with a film-covering method holds the material and stops tearing.
Thin pyrolytic graphite sheets, as thin as 12 micrometers, need proper backing or support during cutting to stop tearing or deformation.
Flexible graphite materials need careful handling. Always lift the sheet by its edges, never by a corner. Corners tear easily under their own weight. Store sheets flat in a clean, dry place. Do not stack heavy objects on top of them. The pressure can deform the material and create weak spots. When you cut the sheet, use a sharp blade and a straight edge. Cut in one smooth motion rather than sawing back and forth. This clean cut keeps the edge strong and stops shedding.
Remember that a sample that works well in your hand may fail in production. Hand-placed samples hide assembly issues. The material seems faulty when the real problem is uneven assembly pressure or poor alignment. Control your process carefully to get consistent results every time.
Your job is not done when the graphite sheet is in place. You must check the setup before closing the assembly. A fast look now saves you from taking everything apart later. These checks make sure your thermal interface material works as it should.
Start by looking at the installed sheet. Check for air bubbles, wrinkles, or gaps between the material and the surface. Light bouncing off the sheet at a low angle shows these problems clearly. Run your finger gently over the surface to feel for raised spots or uneven areas. The sheet should feel smooth and even across its whole surface.
Look closely at the edges. Lifted edges mean poor adhesion or uneven pressure during setup. Press them down softly with a cloth. If an edge keeps lifting, you may need to take off the sheet and put it back with more even pressure. Position shifts also matter. The sheet must cover the whole heat source surface without sliding to one side.
Look over the sheet to spot any air bubbles, wrinkles, or gaps between the film and the surface.
If you see problems, carefully lift and move the sheet to get proper adhesion and alignment.
Use testing tools to measure thermal performance and confirm it meets the expected numbers.
Check adhesion strength from time to time to make sure the sheet stays firmly in place.
Sometimes the system still gets hot even when the setup looks right. Go through these checks in order to find the real cause. Start with the material grade. A mismatch between thermal conductivity, thickness, project power, and space limits causes many failures. Your graphite sheet must fit what your application needs.
Next, look at the thermal path design. Did the sheets connect from the hot spot to the metal housing? Any break in that path stops heat from leaving. Check for gaps, lifted edges, or position shifts after fitting. Also think about boundary conditions. Can internal airflow and shell temperature let this area cool down? Is the metal surface connected the right way?
Surface dirt often causes poor performance. Go back to your cleaning steps. Finger oils or dust trapped under the sheet block heat flow. Application pressure matters too. Uneven pressure leaves air pockets that act like insulators. Finally, check direction. The anisotropic property of flexible graphite means heat moves mostly in-. If you put the sheet in sideways, heat cannot pass through the thickness to reach your heat sink.
Flexible graphite sheets can be reused if not damaged. You can take them off and put them back without losing performance. The key is careful technique. Peel slowly from one corner, keeping the sheet straight and lined up as you pull. Do not bend or fold the material during removal. Bending causes delamination, where the layers split apart and ruin the sheet.
Use at least two people for larger sheets. Three or more people work best if the sheet is over 15 feet long. Wear gloves to keep finger oils off the surface. Avoid bending, creasing, scratching, or dragging the sheet on rough surfaces like concrete. Save any edge protectors during removal. You must put them back when you reinstall the sheet.
If the sheet tears during removal, throw it away. Do not try to fix a damaged piece. The tear creates a weak spot where heat transfer fails. Store removed sheets flat in a clean, dry place. Check the adhesive side for dust before putting it back. A clean surface helps your thermal interface material bond well the second time.
Mastering graphite sheet application comes down to five deliberate actions. Prepare surfaces meticulously with isopropyl alcohol. Handle sheets by their edges to avoid oils and static damage. Cut precisely using die-cutting or sharp blades. Apply even pressure from center outward. Inspect the final assembly for bubbles or lifted edges.
Clean both contact surfaces thoroughly.
Measure and dry-fit before removing the liner.
Cut with proper tools to prevent tearing.
Press evenly to eliminate trapped air.
Verify flatness and edge contact after installation.
This thermal interface material delivers exceptional thermal conductivity between 1500–2000 W/m·K in-, conforms to uneven surfaces, and remains reusable when undamaged. It performs reliably from -40°C to 120°C without degradation. Trust your preparation and attention to detail. DASEN offers synthetic and natural graphite sheets plus silicone pads for diverse thermal management solutions. Visit our website or contact us for tailored guidance on your specific application.
Yes, you can reuse a graphite sheet if it is not damaged. Peel it off slowly from one corner. Keep the sheet flat and do not bend it. Look for tears or creases before putting it back. A damaged sheet will not transfer heat well, so throw it away and use a new one.
For thin sheets, use a sharp knife or scissors. For thicker material, use a die-cutting machine or diamond wire saw. Do not tear it by hand. Dull blades crush the layers and cause shedding at the edges. Clean cuts keep the sheet's ability to move heat.
Graphite sheets move heat mostly along their surface, not through their thickness. For thin sheets, the side you choose matters less than you may think. Both sides work about the same for heat transfer. Instead, focus on covering the whole area and pressing evenly when you install it.
Check three things first. Did you clean both surfaces with isopropyl alcohol? Did you press evenly to push out trapped air? Is the sheet covering the whole heat source? A common mistake is leaving gaps at the edges. These gaps trap air and stop heat from moving.
Graphite conducts electricity, so you need insulation between the sheet and live circuits. Use an insulating layer or pick a silicone thermal pad instead. DASEN offers silicone pads for jobs where non-conductive properties matter more than maximum heat spreading.
Keep sheets flat in their original packaging. Store them in a cool, dry place away from direct sunlight. Do not stack heavy items on top. Humidity can harm the adhesive backing over time. Good storage keeps the material flexible and able to move heat well.
Thinner sheets around 25–40 micrometers work well for tight gaps between flat surfaces. Thicker sheets fill larger gaps but add thermal resistance. Measure the gap between your component and heat sink first. Pick the thinnest sheet that fills that gap without crushing during assembly.